"The doctor of the future will give no medicine but will interest his patients in the care of the human frame, in diet, and in the cause and prevention of disease. "-Thomas Edison

Tuesday, June 24, 2014

Feeling Stiff in the Morning?

Does it take you a long time in the morning to get up and feel loose enough to start your day?  You’re not alone.  Stiffness or tightness in your back in the morning is a much more common complaint then you may think.  There are a variety of causes including poor sleeping habits, a lack of physical activity, and poor posture.  If you are over the age of 35 your back stiffness could be an indication that you have arthritis in your spine.  Whatever the cause, here are some tips to help alleviate your stiffness.

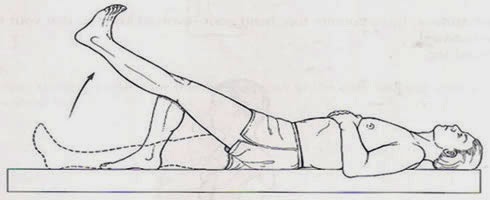
  • ·      Perform the following stretches each morning while you are still in bed.
o   Hug your knees to your chest so you are in a ball.  Repeat a few times relaxing in between.
o   Reach and extend your arms up above your head. Relax by bringing your arms back to your side and the repeat several times.
o   Lie on your back with both knees bent and feet flat on the floor.  Slowly move knees 2-4 inches to the side then return to the center.  Repeat a few times on each side. 
  • ·      Strengthening your abdominal and postural muscles can help relieve pain. Standing with good posture is very important because it removes unnecessary stress on the spine.
  • ·      Take a hot shower to warm up your muscles and joints.
  • ·      Avoid lifting heavy objects in the morning.
  • ·      Make sure you have a good mattress that supports your back.  If you’ve had it for more then 10 years it may be time to shop for a new one.
  • ·      Follow a regular exercise plan.  It doesn’t have to be fancy, even going on a walk every day can improve stiffness.


Tuesday, June 17, 2014

Random Knee Pain

The knee joint holds a majority of the body’s weight.  It is comprised of several different structures including bones, ligaments, tendons, cartilage, and bursa.  The bones that form the knee joint are the femur, tibia, fibula, and the patella.  Ligaments are dense fibrous bands that connect bone to bone.  In the knee joint, they connect the femur to the tibia.  There are four ligaments within the joint and they all help stabilize the knee.  Tendons are similar to ligaments but they connect muscles to bones.  The tendons in the knee are located on the front of the knee and help with straightening the knee.  The cartilaginous structures in the knee are called menisci.  They are located between the bones and form a cushion for the bones.  Lastly, bursa are fluid-filled sacs that also help cushion the knee.

As you can see there are many structures that make up the knee joint.  When one of them is out of place or not functioning correctly, the additional stress causes pain in the area.  This pain can affect daily living because the knee is a major weight bearing joint.  Here are some simple exercises to perform that can help relieve random knee pain. 

Flexibility helps decrease the risk of injury by lowering the stress placed on the knee.  The following stretches can help with knee pain.   Hold each for 10-30 seconds and repeat 3-4 times each leg.

1.     Hamstring Stretch: Lie on your back with one leg flat on the floor. Bend your other leg for support.  Loop a towel around your foot and pull your leg toward your chest keeping a slight bend at the knee. 


2.     Calf Stretch: Stand facing a wall, extend one leg straight behind you. Lean into the wall while keeping your heel on the ground. 


Strengthening the muscles around the joint protects you from injury by stabilizing the joint and decreasing the amount of stress on the knee.  Do each of these exercises 10-12 times, at least once a day.

1.     Straight Leg Raise:  Lay with one leg straight and one leg bent for support.  Slowly lift the straight leg 12 inches off the ground and lower it back down.  Repeat with the other leg.


2.     Leg Extensions: Sit on a chair with your feet resting on the ground.  Straighten one leg at the knee and slowly bring it back to the ground.  Repeat with each leg. 


3.    Side Leg Raise: Lie on your side with your legs straight and together.  Keeping your body straight, lift your top leg to shoulder height and slowly lower back to the starting position.  Repeat with the other leg.


4.     Step Ups: Using a staircase, step up with one foot, and then slowly lower back to the ground.  As you step up your knee should be directly over your ankle.  Repeat with the other leg.


5.     Mini Squat: Stand with feet hip width apart and with toes pointed forward.  Bend slightly at the knees only lowering a few inches.  Then return to standing position.  Make sure your knees stay behind your toes.


6.     Low impact activities like biking, swimming, and water aerobics are a good option because they put less stress on the joint.


Tuesday, June 10, 2014

Shoulder Injuries and Prevention Strategies

Shoulder injuries are becoming some of the most prevalent injuries not only in adults, but in kids as well.  Too many kids are throwing too much too early.  Baseball, basketball, discus, and shot put are among the activities with the highest rates of shoulder injuries.  The slightest shoulder pain can turn into a very serious injury if left untreated. 

The rotator cuff is made up of four muscles that stabilize the shoulder joint.  A strong twisting motion can cause one of these muscles to tear. 

The labrum is a ring of cartilage that surrounds the joint.  It can also tear with a strong contraction of the biceps. 

Shoulder instability occurs when the ligaments securing the shoulder joint stretch from overuse or even poor posture, and cause unsteadiness while throwing. 

Tendonitis in the shoulder is another overuse dysfunction.  This occurs gradually, starting with a small pain when lifting the arm. 

All of these injuries listed can be prevented.  Everyone is susceptible to shoulder injuries.  The proper order to train your body is range of motion, stability, strength, and then sports specific movements.
  • ·      A planned out warm up will properly prepare the muscles, tendons, and joints required for the exercise.  With throwing activities, start with dynamic movements first, for example shrugs or circles.  Next do flexibility enhancing stretches if needed to continue the warm up.  Once you start throwing, focus on technique for your first few throws rather then going all out right away. 
  • ·      Similarly a cool down is an important aspect when it comes to prevention of injury.  Stretch after you throw as well.  This is key because it helps maintain a healthy range of motion.  A lack of flexibility can make you change the way you throw to compensate.  This causes you to use improper mechanics while throwing which greatly increases your risk of injury.
  • ·      Strengthen all of the muscles around the joint.  It is important to strengthen each individual muscle and the entire shoulder as a whole. 
  • ·      Communicate with your coach about any pain you are having.  If caught early, shoulder pain is very treatable.  If you are experiencing a lot of pain it may be better for the long run if you take a day off rather then fighting through it. 
  • ·      With younger athletes, it is the coach’s job to plan practices that don’t overwork the kids.  They must make sure the amount and types of throws are age appropriate.
  • ·      Take time off to rest the shoulder.  Throwing everyday is an easy way to hurt yourself.  Overuse starts at an early age so even kids need to be careful and take these strategies seriously, even if there is no pain yet.

The Thrower’s Ten program is designed to exercise the major muscles necessary for throwing.  The Program’s goal is to be an organized and concise exercise program.  In addition, all exercises included are specific to the thrower and are designed to improve strength, power, and endurance of the shoulder complex musculature. 

Agape offers an Access Care Model that provides you with a chance to be assessed by a physical therapist.  During this assessment you will be provided with an evaluation including several tests to tell you any weaknesses you may have and a plan of care to prevent those weaknesses from becoming injuries. 

For more information about the Thrower’s Ten or the Access Care Model, email agape@agapetherapy.com or call 319-277-3166.